Photovoracity
\ˈfō-(ˌ)tō-vȯ-ˈra-sə-tē\: insatiable appetite for photography.
Thursday, December 6, 2012
Holiday Portraits in Newton
My favorite little bookstore asked me to take some Holiday Portraits on a few days in December!
Sunday, November 18, 2012
Sunday, September 23, 2012
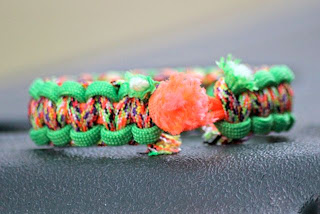
Paracord Bracelet Tutorial
Recently, I was asked to teach a class on making survival bracelets to a
group of women attending a weekend of fun and outdoor skill classes as
part of Kansas' Becoming an Outdoor Woman program. Prior to the weekend,
I put this tutorial together, then forgot to bring it with me to the
class...

Instructions:
First, cut 2 pieces of coordinating paracord at 48” each (main colors).
Cut one piece paracord at 24” (core/closure).
Preparing
the core and closure: Fold the 24” piece of paracord in half. Tie a
firm (but not tight!) overhand knot very close to the raw ends of the
cord. This will be your closure; don’t worry right now if it seems too
big for your wrist - we’ll adjust it later.
Joining the main colors: Take one end of each 48” piece and join as shown. This makes your first knot. Leave it a little bit loose until you’ve finished the next step.
Insert the core with the folded end first, leaving a loop about 3/4” long and tightening down the first knot as shown. This is the beginning of your bracelet!
Begin your knots, and repeat these steps below until you are satisfied with the length of your bracelet.
When the bracelet gets long enough to comfortably fit your wrist, make sure the first and last knots are tied tightly by pulling on the ends of paracord at each end of the bracelet.
Try it on, pushing the knot closure on one end through the loop on
the other to fasten it around your wrist. If the knot seems to be in
the right place, congratulations! If not, simply untie the knot and
re-tie it in a more comfortable place
Test all knots one last time to make sure they’re tight - then trim all loose ends of paracord leaving about 1/2” of cord... and get ready to play with fire.
Test all knots one last time to make sure they’re tight - then trim all loose ends of paracord leaving about 1/2” of cord... and get ready to play with fire.
CAREFULLY light the lighter and use it to gently melt all ends of the
paracord, using the side or bottom of the lighter (not your fingers!) to
press the melted end to the bracelet as shown.
Try on your bracelet and wear it with pride!
Thursday, September 20, 2012
Monday, September 17, 2012
Subscribe to:
Comments (Atom)


